The ability to remain alive in risky situations where death is a distinct possibility is defined as survival. Your ability to survive is dictated by your understanding of what you should or shouldn’t do. Whenever you find yourself in a survival crisis, your thinking is your most valuable asset.
Not understanding what you should do and panicking are the two most common reasons why people aren’t able to survive outdoors. Most people die as a result of their mistakes, instead of by the elements in the wilderness. This is why having a list of priorities for survival is important.
What Are Priorities For Survival?
The American Boy Scouts coined the term “Seven Priorities of Survival,” and it’s an important element of the knowledge required to earn particular survival badges.
Teaching children about survival priorities is both fun and important, but this knowledge will also come in handy if you’re an adult stuck out in the wilderness. You may end up finding yourself in a scenario where you have to survive. This information will help you figure out exactly what you need to do.
The 7 Priorities For Survival
The seven priorities are listed in order of significance, so it’s recommended that you stick to the order as much as possible.
1. S.TO.P
S.T.O.P is an acronym for Stop, Think, Observe, and Plan. It signifies what your reaction should be when you realize that something has gone wrong.
Stop
When you realize that there’s a problem, the first step you should take is to stop right away. The earlier you stop, the easier it will be to correct the situation. There’s really no point in worrying and wandering in circles in search of a solution.
Panicking and running around will only waste your time, and that’s valuable time that could be spent trying to figure out a solution. Pause where you are, take a deep breath, and remain as calm as possible.
Think
The next step is to start planning your next actions. As previously stated, the most crucial resource you’ll have in the woods is your thinking. This is why you shouldn’t overlook its significance. You can begin by determining the precise details of your problem, and then consider the most ideal solution to the issue.
Observe
You’ll only be able to make the most out of your surroundings if you know exactly what’s around you. Additionally, when you’re in a group, observe and see whether there are people who need attention.
This is especially if there’s someone who is injured or having a panic attack. After you do that, you can begin evaluating the circumstance, condition, and your own wellbeing. Look around you and try to figure out where you are.
You can also use a compass and a map for this. You should try to detect any problems in the surroundings around you before they have a significant impact on your situation.
Try to use your tools or survival gear whenever it may be useful. Always keep an eye out for water sources that may be close by to avoid dehydration.
Plan
After you’ve completed the preceding tasks, you can begin planning the next moves. Always think about doing the most essential things first. If you or anybody else in your vicinity is hurt, don’t go looking for food first.
Also, don’t even start building a shelter until you’ve determined how safe your surroundings are. You’ll need to plan so that you can make the most of natural light while it lasts!
2. Provide First Aid
If left untreated for an extended length of time, even the tiniest injury can become an issue. A little wound in your arm or leg, for example, could get poisoned or make you sick. That’s why you must not only listen to your body’s signals, but also urge everyone else to remain cautious.
If somebody is injured, you should put everything else aside and respond to the situation. If you were intending to climb somewhere and there’s someone in your group who is suffering from an injury, no matter how minor it may seem, you don’t want to increase the difficulty for them.
Watch out for any illnesses that aren’t readily apparent to the naked eye, such as hypothermia. To prevent further infection, injuries must be treated as quickly as possible. First aid is essential for survival, especially when you’re in the great outdoors.
Mental wellness and having a positive attitude are also crucial. The majority of individuals who have survived in extremely dangerous outdoor settings have done so because they believed that they could.

- [250 PCS First Aid Survival Kit, Meaningful and Cool Gifts Ideas for Families and Outdoorsman]Designed by army veterans and survivalists, the most compact and robust survival first aid kit contains essential first aid supplies and survival tools required for emergencies. Weighs only 2 Lbs, the kit is a must-have for your bug-out bag.
- [Be Prepared for the Unexpected, Complete Comprehensive First Aid Essentials Exceeds OSHA Guidelines]The product includes more than enough med supplies to treat a single family under emergency circumstances. Perfect for taking care of any medical or emergency needs during outdoor wilderness adventures such as camping, backpacking, boy scouts, hiking, hunting and mountain biking.
- [Molle EMT Pouch, Durable, Portable, and Water-Resistant]The military grade bag was made from 1000D water-resistant nylon, it offers three large compartments and many straps to get your supplies organized. The overall dimension of the kit is 8’’ x 6.5’’ x 5’’. The kit can be attached to any molle system: backpack, vest, vehicle molle panel.
- [Top Quality Survival Gears Safeguard Your Next Adventure]Stuffed with the most essential survival gadgets: mylar space blanket, 3-mode tactical flashlight, multi-function paracord bracelet (compass, whistle), flintstone, knife, saber card, two 12 hour glow sticks and emergency rain poncho.
3. Get Shelter
Hypothermia, heatstroke, and heat exhaustion are all examples of temperature-related illnesses. Any of these things could impact your health as well as your capacity to think properly.
The easiest way to prevent these medical issues is to keep warm, dry, and avoid the rain and wind. You can’t stay outside for very long without shivering in the cold. You’ll need to be somewhere that’s safe from the elements, including the cold, heat, rain, storms, as well as other natural phenomena.
This is why you should start thinking about finding some shelter once you’ve reached a particular point on your journey. You may not need to build a shelter in some situations, but you must be ready for the night and the best thing you can do is start preparing early.
Keep a lookout for any probable shelter-building tools. If you’re in a location where there’s a cave close by, go inspect it before you decide to stay there for the night. This helps avoid any unforeseen problems or surprises.
When it comes to survival circumstances at night, hypothermia is your worst enemy. Having a shelter after nightfall will keep you dry and warm in the event of rain or strong winds.
The rule of thumb to follow when you’re building your own shelter is that the smaller the better. You will also need to have adequate clothing so keep your clothes dry. If you need your improvised shelter to be warmer, use foliage, dry leaves and other greenery to insulate it.
Make sure your shelter isn’t in the way of the wind. Natural windbreaks, such as the leeward side of a hill, big stones, or at the very least a live tree, should be used. The ground should be insulated.
In case you have sleeping pads, place them on top of a pile of pine needles, evergreen branches, or dried leaves. These can also be used in place of a pad if you don’t have one. The more insulation you have between the ground and you, the better.
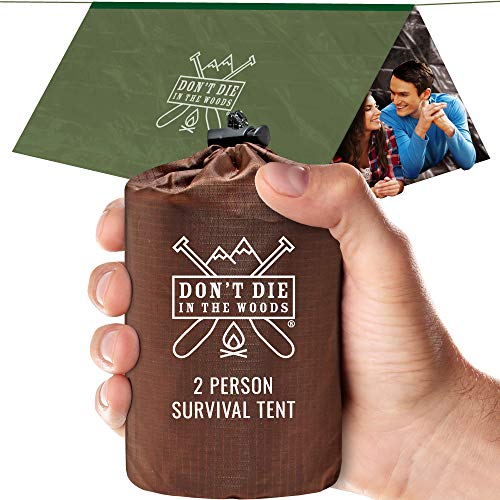
- TOUGHEST ULTRALIGHT EMERGENCY TENT ON EARTH – Our tear-resistant, extra-thick HeatFlex mylar is stronger and more flexible than ordinary mylar. With 425-lb strength paracord & reinforced tape seams, this is a truly reusable survival tube tent built to withstand harsh weather conditions. The perfect balance of durability & weight at 9.5 oz.
- “THESE SHOULD BE IN EVERY BACKPACK…” – your words, not ours. Designed for hiking, camping, and outdoor adventures to be ultralight, compact, with room for two adults. NASA-designed mylar is waterproof and reflects up to 90% of body heat for cold, wet, or hot weather survival and countless other uses year-round.
- SET UP IN A SNAP – Simply run the paracord through the tent and tie up between two trees. Use rocks or gear to anchor the corners, and climb in. Can also be used as an emergency sleeping bag, emergency bivey, or space blanket if there are no trees around.
- INDUSTRIAL STRENGTH PARACORD & REINFORCED SEAMS – Other emergency shelters are made flimsy and cheap for one time use. We’ve tested and designed every detail with the highest quality materials available. Stash these emergency tents everywhere – in your cars, survival kit, first aid kit, bug out bag, zombie survival kit – and enjoy the outdoors with confidence.
4. Start A Fire
If possible, a fire will keep you warm at night and help you prepare food. Make sure to observe your surroundings prior to building a fire. You don’t want to seek supplies in the wilderness if the sun is about to set.
You wouldn’t want nightfall to find you away from your station or the rest of your team if you are with a group of people. regardless of how strong you think your body is, it can only endure for so long before hypothermia sets in or your hands start to freeze.
Do not underestimate the value of a fire because it could end up saving your life. You need three things in order to start an outdoor fire.
- Tinder: a flammable substance that can easily be ignited with a spark. Some natural sources of tinder include dry grass, tree bark, and wood shavings.
- Kindling: size is slightly larger than that of tinder. It adds fuel to the fire, allowing it to grow bigger.
- Fuel: typically, you can use larger wood pieces for fuel.
Wet or living wood doesn’t burn as well as dry, dead wood. If it’s raining, look close to the base of trees for something drier. Before it gets dark, try to gather enough wood to last the entire night.
Maintain a moderately sized fire that’s big enough to serve as a warmth, drying, and signaling mechanism, but not so huge that it consumes all of your firewood. If you find yourself in a situation where you don’t have matchsticks or a lighter there are some alternative ways you can start a fire.
Rubbing two sticks together is one of these methods, which is also referred to as the hand-drill method. However, unless you’re a pro, this method takes a really long time, so you need to be patient.
A fireboard or a small cedar board and a narrow, straight stick are required. It will also be useful if you use a knife. Friction fires need both the proper materials and good technique to be successful.
On a sunny day, a huge magnifying glass can ignite a fire, but this method is worthless at night. Also, to start a fire using this method, it has to be a huge piece of glass. The magnifying lens on your pocket knife won’t work.
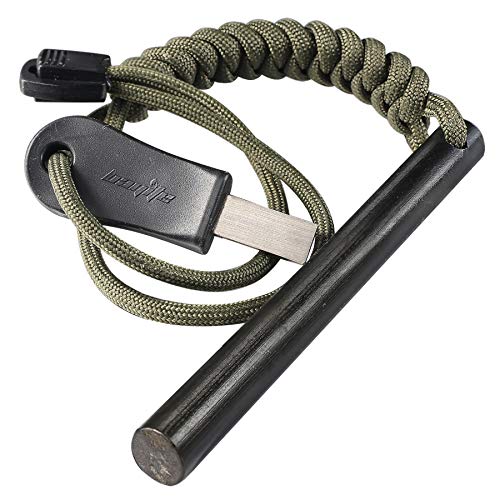
- 5ft Paracord included, gives you a good grip and never comes off. Comes with a bayite Striker-Pro striker attached to the paracord, always be prepared to start a fire
- bayite 6 Striking Edges Striker-Pro striker is made from TOOL GRADE HSS STEEL and has a distinct hardness, maximizes a shower of hot sparks, no matter whether you prefer to use your left hand or right hand to scrape. Don't use bad quality Knife as striker. Otherwise it will not produce enough sparks due to insufficient hardness of blade
- Ferrocerium Rod Length:4"(10cm). Diameter: 3/8"(10mm). Large enough for a shower of sparks and small enough to carry
- Made of high effective ferrocerium rod. Waterproof & Weatherproof, fits all weather, works in any weather condition
5. Signal For Help
In just about any survival crisis, signaling for help is the fifth priority. If you’re lost, the easiest way to find your way back is to be discovered. Signaling rescuers is the best way to assist them in finding you. Below are some ways that you can signal for help.
Use Electronics
Electronics you can use include items like your cell phone or a portable radio. Save your batteries until you get to a place that has a signal. High spots, such as the tops of hills, are good places to start.

- Call Tones: A call tone is what people calling you can hear instead of the normal default ring. It grabs the attention of your family and friends before you start speaking.
- Quickly Find a Channel: Use the scanning feature to see which channels are currently in use.
- Flashing Low Battery Alert: Low battery alert reminds you when batteries are running low.
- Keypad Lock: Keypad lock prevents your personalized settings from being inadvertently changed.
Use Fire and Smoke
A smoldering fire can aid rescuers in locating you. Use moss, ferns, wet wood, and wet leaves to make a cloud of smoke to communicate that you need help. These items will help thicken the smoke and make it much more visible.
Make Noise
Three loud sounds are the globally recognized signal for the word “Help!” Loud sound blasts, an emergency whistle, shouting, three gunshots, a horn, and other similar sounds can be heard. After a few moments, repeat the sound.
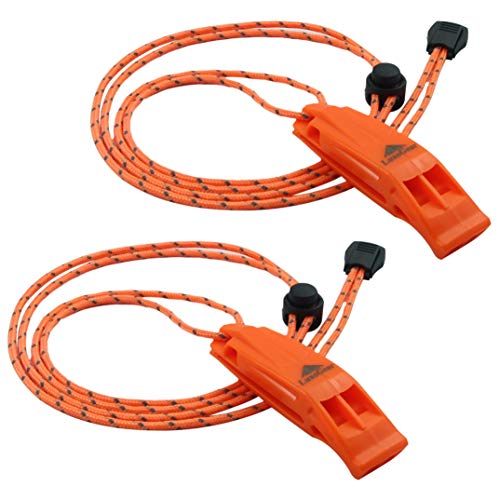
- SUPER LOUD survival whistle: double tubes emergency whistle, high pitched powerful noise maker with dual sound chambers, can provide up to 120 decibel dB sound power, enough to be heard over a mile away. Cannot be overblown, works great as signal whistle.
- PEALESS DESIGN means no moving parts, nothing to obstruct sound, and nothing to jam, break or freeze. Lightweight and fail safe nice whistle works well in any conditions with excellent airflow design. Comfortable mouth grip, won't stick to lips like METAL ones in cold environments.
- ADJUSTABLE REFLECTIVE LANYARD and CLIP, high visibility even in the dark with slider button to adjust length around neck, long lanyards can easily loop through backpack, sailboats, camp hike gear, life jacket, kayak PFD, paddling paddle board, bike. You can also clip the whistle to your belt or shoulder straps for quick and easy use in case of emergency.
- SUPER DURABLE high impact ABS plastic construction ensures strong durability and complete waterproof moisture resistance. Premium quality whistles to carry for life safety, camping, hiking, backpacking, hunting, archery, fishing, swimming, boating, kayaking, marine sporting events any kind of outdoor activities, also for dog training.
Use Bright Colors
Look through your stuff for anything that’s vividly colored. Disperse them on the ground so that possible rescuers will notice them. It’s best to place them in the open.
Another wonderful technique in order to grab attention is to make a flag out of these materials. Movement, such as flapping a brightly colored cloth, will be beneficial.
Use a Signal Mirror
A signal mirror can be beneficial for flashing a light in the direction of prospective rescuers. An old CD or some glass can suffice if you don’t have a mirror.
As you signal, put the other hand up and make a V-sign using your two fingers. You can create flashes by tilting your mirror back and forth, which will help draw more attention.
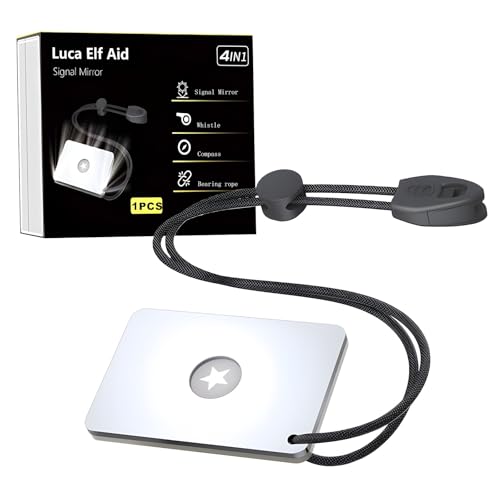
- SIGNAL MIRROR MATERIAL and SIZE: (Material)-Acrylic, strong toughness and not easy to break, better reflective effect, signal mirror military grade survival signal mirror for rescue. SIZE - 3 in X 2 in X 0.22 in, Product weight:1.16 oz.
- MULTI-FUNCTION signal mirror survival kit: Signal mirror survival, Whistle for help, Compass,Load-bearing rope. Multifunctional outdoor distress tool.Ideal for cars, outdoor adventures, mountain climbing, camping, hunting, fishing, extreme sports, ultimate survival technologies, etc.
- HIGH PERFORMANCE: Ultralight small signal mirror with built-in precision aiming system making it ideal for any survival kit.It is especially suitable for long-distance communication in the field, sending reflective survival mirror signal,accurate and fast signal transmission.When the weather is fine, the light signal transmission distance can reach more than 100 kilometers. It can also be used normally when there is light on a cloudy day or at night. Can be used as a mirror in peacetime.
- OUTDOOR SURVIVAL ESSENTIAL: The sight survival mirror military is an essential option in any survival emergency kit. One of the five major elements of outdoor survival is the signal generating device. There is a consensus among survival experts all over the world: Anyone who is engaged in remote outdoor activities should carry a compass and a Flintstone, signal mirror survival kit.
Use Ground Signals
On the ground, spell out the letters “HELP” for aircraft rescuers to see. Knowing how to use codes in a technical way will also be beneficial. Here are some codes that are easy to remember.
- V: “need assistance”
- X: “need medical assistance”
- ↑: pertains to a direction, such as the direction of your camp
6. Find Water and Hydrate
In any survival encounter, having drinking water that’s safe to consume is the sixth priority. If there’s plenty of water, drink a lot of it. You can spend days and even weeks without food, but you will perish within days if you don’t have access to drinking water.
There are many ailments that can be hastened by dehydration. As a result, to accomplish what’s necessary to survive, you need water.
Consume 6 – 8 liters of water every day if you’re doing hard activities, and at least 4 liters if you’re not. If water is plentiful, you can have a lot more. 1 – 2 liters a day is fine if you’re just sitting waiting for help, although it never hurts to consume more.
Preferably, don’t wait long periods of time before guzzling and gulping the water. This is because the water will pass through you and you’ll actually end up squandering the majority of it by urinating.
Drink enough water by sipping it throughout the course of the day so that your body can absorb it all. You’ll know if you’ve had enough to drink if your pee is pale yellow. You can also tell if you’re dehydrated if your pee is dark yellow, gold, or smells bad.
When searching for a suitable water source in the wild, keep in mind that you should always strive for the purest water possible. If possible, get water from slowly flowing water rather than rapids, and always avoid smelly water.
Water can be found at the base of rock cliffs, in the bottoms of alleys, and at the ends of animal routes. You can also search for hollow stumps and huge boulders with depressions, and keep in mind that slowly moving water is preferable to still water.
The quality of the water is also crucial. The cleaner the water, the more likely it is to be safe to drink. Nevertheless, there are no assurances, and it’s preferable to purify all water before drinking it. Below are some of the other ways that you can find water.
- Make a hole in a stream bed that has dried out. Beneath the surface, water is frequently still flowing. Search for a sandy area to dig in. You’re more likely to get water if you make the hole on the edge of a sharp bend.
- To get water from a tree branch, tie the opening of a big plastic bag around a tree branch. Make sure that the open end is as airtight as possible, and that the plastic bag is clear. Put a small pebble in there to draw one of the corners down.
When water collects, you can drain it by poking a hole in the bottom. However, if you attach a siphoning tube to the plastic bag, it will be reusable. To get a cup of water, you’ll need a whole day of sunshine.
- In a sunny location that’s also damp, dig a hole that’s 2 feet deep and 3 feet wide. Fill it with leafy branches and a collector at the bottom. You can crunch the leaves a little. Using a plastic sheet, cover the hole and ensure that the plastic is properly tamped down all the way around.
Put a rock in the center of the sheet, exactly above the collector. This will allow water to drain down the hollow and into the reservoir. This is a sluggish process because you get a cup or two every day, but it works.
- Water can be found in areas of vegetation, typically in dense forests and dry places where specific plants like cacti store water. Simply cut it about 2 feet above the ground.
You may need to hollow out a cup inside the stump in order to properly catch the water that seeps up. Keep in mind that deciduous forests are not particularly conducive to this method.
- Particular foods are high in water and will help keep you hydrated. This includes numerous fruits and vegetables. Since fish flesh is high in protein, and hence requires more hydration, it’s ideal to wring the raw meat inside a cloth. You can then get water from wringing the cloth out.
- A bandana is a great way to soak up water that’s hard to reach or by catching dew. Collecting the morning dew is another way you can obtain water if you are looking to survive. When strolling through grasslands, tie bandanas to your ankles. Wipe the broad leaves clean and then wring out the extra water and place it in your mouth or a spare container.
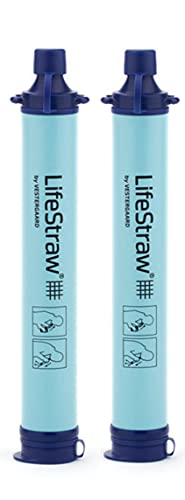
- Protects against 99.999999% of bacteria (including E.coli, Salmonella; 99.999% of parasites (including Giardia and Cryptosporidium); 99.999% of microplastics, silt, sand, and cloudiness
- Ultralight and durable, the LifeStraw weighs less than 2 ounces (46 g) so you can pack it anywhere
- Long-lasting membrane microfilter will last up to 1,000 gallons (4,000 L) of water, that’s enough drinking water for an individual for over 5 years
- Be prepared with the ultimate survival tool, the LifeStraw has an unlimited shelf life and has been tested all over the globe to face the harshest conditions
7. Find Food
In any outdoor survival situation, food should be the last thing on your mind. Because the human body can go up to 21 days without eating, it ranks last on priorities for survival.
You can’t go that many days without water. After you’ve covered all of the steps on this list, then you can start thinking about what to eat.
To begin, think about all of the items you currently have that could be used as food for you or the people you are with. Children should always come first when it comes to sharing food, since they’re the weakest members of the group.
When obtaining natural supplies, ensure you’re completely certain that what you’re obtaining is good for you. Since many wild berries and mushrooms are harmful, you should never eat them.
Also, don’t put everything else on hold just because you are hungry. Hunger tends to be less physical and more mental. That is why after going without food for a few hours you feel the desperate need to eat.
Your body only needs a certain amount of food to survive. If you’re sitting around waiting for help instead of constantly moving around, you’ll be using significantly less energy, so your food supply will last much longer.

- COMPREHENSIVE 30-DAY EMERGENCY FOOD SUPPLY: Ensure your family's safety with our ReadyWise 30-Day food kit. Packed with 298 servings, it's perfect for emergency preparedness, providing essential nutrition during unforeseen disasters.
- 25-YEAR SHELF LIFE: Our freeze-dried food supply is designed to last. With a remarkable 25-year shelf life, you can trust that your emergency food will be ready whenever you need it, no matter the circumstances.
- DELICIOUS VARIETY FOR EVERY PLATE: From hearty soups to tasty oatmeal and more, our food buckets offer a diverse range of 10 mouthwatering meal options. Enjoy great-tasting, real ingredients even in emergency situations.
- EASY-TO-PREPARE & READY IN MINUTES: When the unexpected strikes, our food is your ally. Simply add water, stir, and cover – in just 15 minutes, you'll have a hot, satisfying meal ready to eat. No hassle, no worries.
Conclusion
Understanding the 7 priorities for survival will help you stay alive in most emergency situations, such as being lost in the wilderness alone.
Always ensure that your backpack contains everything that you would need for survival when venturing out. In case things go wrong and you end up getting lost, this will enable you to meet your basic necessities and survive until you can navigate your way and get back home!
When faced with adversity, knowledge will always be your most powerful weapon. In the woods, employing the aforementioned survival tactics will improve your odds of surviving.
We hope that this article was helpful and made you feel more prepared before going on your next outdoor expedition. Please feel free to check out our other survival tips, outdoor information, and outdoor gear recommendations by visiting our site!