Setting up traditional fire pits and gathering around with your pals is always warm, cozy, and fun. There’s just one tiny issue: it can completely smoke up the immediate area in minutes. The solution? Learn how to make a smokeless fire pit.
While smokeless fire pit burns aren’t exactly what we’d call conventional, they offer many advantages that make them superior to the standard fire pit.
So, it stands to reason that before you even consider switching over, you know what smokeless fire pits are and why you’re better served making your own.
Table of Contents
- Smokeless Fire Pits: What They Are
- How Smokeless Fire Pits Work
- Why Consider Smokeless Fire Pit Options?
- How to Make a Smokeless Fire Pit in 9 Steps
- Step 1 – Familiarize Yourself with the Open Fires Regulations in Your Local Area
- Step 2 – Get the Necessary Supplies
- Step 3 – Mark Out the Designated Fire Pit Area
- Step 4 – Start Digging
- Step 5 – Level the Dirt
- Step 6 – Add the Gravel
- Step 7 – Begin the Block Laying Process
- Step 8 – Stack the Walls
- Step 9 – Install the Fire Ring and Fire Bricks
- Final Thoughts

Smokeless Fire Pits: What They Are
Broadly speaking, smokeless fire pits are simply your regular outdoor fire pit fitted with innovative designs to make it more efficient without releasing the fan of smoke peculiar to traditional fire pits.
There are a wide variety of smokeless fire pit options to choose from today. What’s more, each of these machines has unique features that distinguish the level of heat efficiency, heat levels, percent of carbon monoxide emissions, and various other perks of the system.
However, at its core, these tools share the same basic operating process.
How Smokeless Fire Pits Work
A typical smoke-free fire pit comes with two different combustion mechanisms. There’s the primary combustion mechanism, or inner combustion chamber, and the secondary combustion mechanism, or outer combustion chamber.
These combustion systems are positioned away from each other in a way that allows for adequate oxygen and airflow through the mechanism.
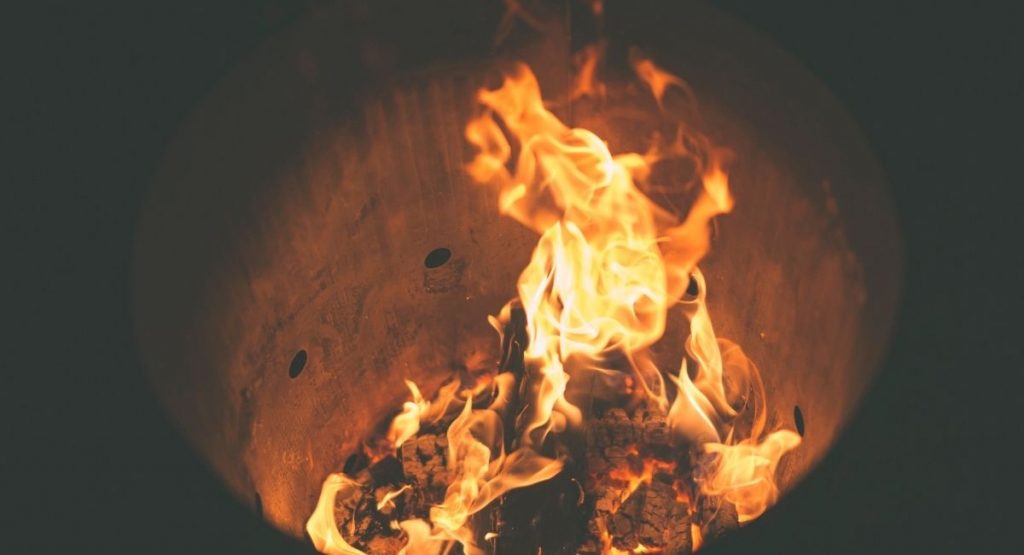
The outer part of the smokeless fire system has holes spread all over its lower part. This is to further facilitate the free flow of air into the chamber. It enhances the efficient circulation of sufficient oxygen, helping you burn certain types of fuel more completely.
Smokeless fire pit designs are made to fully burn up pieces of wood via complete combustion. That way, only barely visible smoke is produced.
As an added bonus, its efficient burn releases considerably more heat compared to the conventional bonfire pit.
So, when sufficient oxygen enters the bottom of a smokeless or mini-smokeless fire pit, it comes out through the sides. This results in a re-burn effect or secondary combustion process at the top of the fire.
That’s exactly why a smokeless fire hole generates a considerable amount of flames. It’s also what’s responsible for the minimal smoke output observed with this type of backyard bonfire.
Why Consider Smokeless Fire Pit Options?
On the whole, certain things like the prices on smokeless fire pits compel a lot of people to still stick with using their more conventional backyard pits.
Another reason that you might want to stick with traditional fire pits is that the type of fuel they use is cheaper.
That being said, there are numerous reasons why you would be better served using any type of smokeless fire pit combustion mechanism out there. Here are just a few.
- SMOKELESS FIRE PIT: Experience the magic of a cozy, smoke-free fire that’s perfect for any outdoor setting. From camping trips to backyard gatherings, this air-flow efficient outdoor fireplace keeps your fireside experience free from the hassle of smoke, teary eyes, or lingering odors.
- WARMTH ON THE GO: This portable, lightweight camping heater weighs just over 20 pounds and comes with a convenient carrying case so you can make it easy to bring the warmth and ambiance wherever your adventures take you.
- EASY TO CLEAN: Spark up adventure without the hassle of deep cleaning. This fireplace features a removable ash pan and base to make post-fire cleanup a breeze. Spend less time cleaning and more time enjoying your fireside experience.
- LASTS FOR YEARS: Created from premium 304 stainless steel with a high-heat ceramic coating, this smokeless fire pit ensures long-lasting durability, making it a reliable addition to your outdoor fireplace collection.
Minimal Smoke Production
Using conventional fire pits results in the incomplete burn of fuels like seasoned wood or wet wood. The resulting incomplete combustion leads to the significant smoke production observed with this system.
Thanks to the smokeless structure and innovative designs of a smokeless fire hole, you get complete combustion and a clean burn.
This results in the release of minimal smoke production and more efficient use of the type of fuel you use.
Reduced Exposure to Toxic Smoke
Using a standard fire pit for your backyard fires also puts your health at risk, all thanks to the copious amounts of carbon dioxide, benzene, and formaldehyde it releases in invisible and visible smoke when certain types of fuel like wet wood or a piece of paper is burned.
The efficient burn you get with tools like the smokeless fire pit production BioLite FirePit Outdoor smokeless fire pit grill or Dakota fire pits ensures you never have to worry about your health.
Only clean and harmless smoke comes up through this device’s vent shaft, if any.
Extra Comfort
Your regular backyard fires don’t exactly prioritize comfort. That’s because visible smoke can irritate your ears or nasal canal. They can also cause a lot of other discomfort.
A gas fire pit has a combustion chamber and various other features that ensure this never happens. You can get close to these flames, regardless of the type of fuel without having to worry about irritations.
Knowing how to make a smokeless fire pit helps you enjoy your backyard fire to the fullest.
Reduced Environmental Impact
When you burn firewood like wet wood or even kiln-dried firewood, the visible smoke they give off increases the amount of greenhouse gases in the air. At that point, you’re pretty much polluting the atmosphere.
If you’re concerned about nature, a smoke-free fire can help you reduce your environmental impact without sacrificing extensive heat output.
How to Make a Smokeless Fire Pit in 9 Steps
Now that you know the perks of using a smokeless fire pit hole, all that’s left is to leverage this powerful resource.
If you don’t want to get Dakota fire pits or a BioLite FirePit Outdoor smokeless fire pit grill, not to worry!
Here is a simple DIY guide to making effective smokeless fire pit designs.
Step 1 – Familiarize Yourself with the Open Fires Regulations in Your Local Area
In the course of preparing your own smokeless fire hole, the last thing you want is to get in trouble with the law.
To avoid any weirdness with the cops, make sure you know the rules guiding open fires in your area. If need be, make sure you secure the necessary permits before you start this process.
Step 2 – Get the Necessary Supplies
For the task at hand, you’ll need to visit your store to get some key items.
These include a stake, gravel, concrete blocks or bricks, a metal liner, some string, and a tape measure. You’ll also need to grab a shovel, some chalk, level, tamp, and fire-resistant material like a mortar (this one’s optional).
You want to make your fire pit at least 12” thick, so keep this in mind when you go to get supplies.
Also, you need to make a smokeless hole with certain dimensions. Popular smokeless pits range from:
- 19.5-inch diameter
- 23-inch diameter
- 25-inch diameter
- 42-inch diameter
You shouldn’t let the hole exceed the 42-inch diameter mark. Otherwise, you will need to burn a lot more fuel before you can get adequate heat.
Step 3 – Mark Out the Designated Fire Pit Area
Next, identify the spot you want to set up your fire pit, and be sure to mark it effectively.
To do this, drive a stake into the ground that will mark the center of the fire pit, attach a string to it, and connect your chalk to the other end of the string.
Lastly, drag out the string and fully outline the entire fire pit area.
Step 4 – Start Digging
With the fire pit area now fully highlighted, you need to dig a 6” or 12” hole, depending on your preference.
Next, remove the stake, get your shovel and clear out the topsoil to remove materials like grass and excess dirt from the surface of the ground.
Step 5 – Level the Dirt
This process is relatively simple. All you have to do is tamp down the dirt and make the surface even.
Once the surface is properly leveled, move on to the next phase.
Step 6 – Add the Gravel
Pour in the gravel into the hole until it reaches the surface. Again, you’ll need to use your tamp to level out the surface.
Lastly, make sure you pack the entire area tightly. Otherwise, you might not be able to get an efficient burnout in your fire pit.
Step 7 – Begin the Block Laying Process
While ensuring that the surface your fire pit sits on is perfectly level, lay the bricks or blocks you got in a circle.
Where there’s a very minor imbalance, you can insert chunks of gravel to get better precision.
Step 8 – Stack the Walls
Now, add a second and third layer to the first to complete your fire pit. You need to offset the blocks properly so that your smokeless fire hole is very sturdy.
Depending on the type of material you’re using for the stacking process, you may or may not need fire-resistant mortar.
Step 9 – Install the Fire Ring and Fire Bricks
This last step is necessary to ensure the longevity of your smokeless structure.
To properly install your fire ring, you need to ensure that you place your fire bricks after you’ve constructed the out wall of the smokeless pit.
Next, you may need to attach the mortar to the fire bricks located on the outer wall. During this process, make sure you leave enough space. This is to ensure maximum airflow and optimal combustion.
Now, all you have to do is let the mortar dry completely and our fire pit is ready for use!
Final Thoughts
Using smokeless fire pits can make a big difference in your outdoor experience. To make a perfect evening in front of the bonfire even more perfect, invest some energy in learning how to make a smokeless fire pit.
Now that you know how it’s done, all you need to do is get out there and start building! To get more from the great outdoors, check out our other articles.


