Emergency toilet options are one of the most overlooked aspects of emergency preparedness. So many people run around thinking about food and shelter (obviously quite important), but forget to think about what to do with their waste.
This is because the concept of using a normal toilet is so familiar to us that it can be kind of jarring when you have to find other solutions.
Fortunately, this article will cover everything you need to know about emergency toilets and the best way to build one for yourself. Trust us, this is a skill that you’ll be happy to know if things ever go south.
Table of Contents
Why Are They Needed?
A major challenge to sanitation during a disaster is what to do with human waste. It’s not something people like to talk about too much, but poorly handled sanitation around this can lead to cholera, dysentery, and severe dehydration. This can take an already bad situation and make it even worse.
When you think about it, modern sewage treatment solutions are one of the most underappreciated aspects of civilized society. The sheer amount of sickness and disease that they prevent is quite staggering.
Unfortunately, in a disaster scenario, these systems will often fail, leaving most people in a bind. They obviously can’t stop going to the bathroom but typically don’t have a clue what to do about it.
This is where an emergency toilet comes in. We often see a significant rise in sickness in areas that experience a large-scale disaster (especially when the effects linger for a while). Luckily, even the most makeshift plastic bucket toilet can save the day.
Stopping Backflow From Happening (Crucial)
Before you start preparing your emergency toilet, you’ll want to make sure that your home won’t be overrun with sewage in a disaster scenario. When waste management systems fail, it’s common for sewage to back up and overflow into homes.
This is why you need a backflow preventer.
A backflow preventer is a flapped valve that ensures that solid waste can only leave your home and has no chance of traveling back into your house. This will be a lifesaver and will allow you to spend your time on more important things without worrying about sickness and cleaning up your house.
If your home doesn’t have a backflow preventer, it’s probably something you want to consider buying for general peace of mind (even in a non-disaster scenario). Some cities have free subsidies to offset the costs and some insurance companies will even give you a price break on your premiums.
The value itself can run anywhere from $25 to $500 depending on which one you choose and local codes. Installation is usually a bit more complex, but it can be done by a more experienced DIYer. Otherwise, you’re looking at around $300 to $1,000 for the install.
How to Flush a Toilet During an Emergency
So now that you’ve prevented one disaster, you need to figure out how to use the bathroom during a disaster.
In some situations, you can still flush your toilet by pouring water directly into the tank or into the bowl, even if your water isn’t working. This does require a bit of water to pull off, but it will keep you from needing to use an emergency bucket, composting, or camping toilet more than you have to. Just make sure you’re pouring it in with enough force to trigger the flush.
The downside of this is that you’ll eventually need to transition to using an emergency toilet. This is because you don’t want to risk having sewage stuck in your house since the sewage lines might not be moving waste as they should.
Emergency Toilet Types
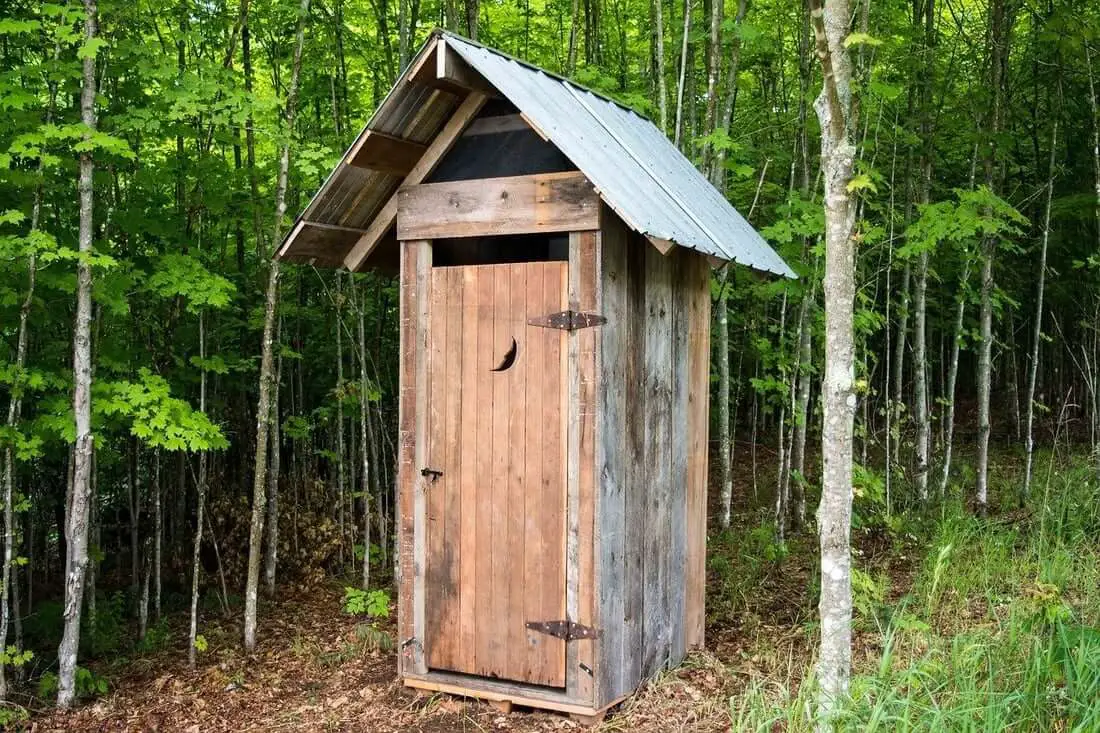
If you live on a large property, you can set about building an outhouse or digging a pit latrine. However, this is not feasible for most people living in cities or suburban lots because their lot simply isn’t large enough to facilitate this setup.
If you have land and want to give this a shot, you’ll need to be at least 100 feet away from your house and from any running water sources. This is the bare minimum and requires that your area isn’t prone to flooding and doesn’t have a high water table. If you don’t know, don’t risk it.
For the majority of us or in the case of short-term disasters, I suggest a dry composting system for your prepper toilet. This is the most flexible and easiest-to-maintain option, has the least “ick” factor in my opinion, and requires very little equipment. It’s an amazing solution in situations where you don’t have access to a septic system and your water supply is short. If you’re in a cabin in the woods or some other bug-out location, you should definitely opt for a dry composting toilet.
To get set up with a dry composting toilet system, you’ll need a few things, including:
- An area on your land that’s far from your house and water sources
- A portable toilet seat – usually can be found at affordable prices
- A few 5-gallon plastic buckets – get a TON of these
- Hand sanitizer – essential
- Toilet paper
- Sawdust, kitty litter, or hamster bedding for covering
- Funnel and tubing for urine diversion
- A big box of trash bags
- A dedicated pitchfork
- A shovel
- A few camo tarps for privacy (other materials can work too)
Before explaining the process of building a dry composting toilet system, I’d like to remind you that this isn’t the only option. You can go with a quality camping toilet or make a twin-bucket system.
Camping toilets don’t cost much, are easy and simple to use, and suitable for short-term disasters. Their biggest advantage is possibly their portability. However, such portable toilets tend to fill up fast, which means you’ll have to deal with a smelly mess unless you find somewhere to dispose of the waste. I strongly suggest using plastic garbage bags to line the toilet and make the clean-up much easier.
Twin-bucket toilet systems are recommended by many states and localities. They are based on the concept of separating pee and poo. This is smart because poo contains dangerous pathogens, while pee is usually sterile and can be used as a fertilizer. To make such a toilet system, you’ll need 2 5-gallon buckets, 2 tight-fitting lids, 2 bucket toilet seats, carbon materials (sawdust is a great choice), disposable gloves, biodegradable or plastic bags, toilet paper, and a hand sanitizer. Remember: you should have one pee bucket and one poo bucket and use them accordingly.
If you have little children, you might want to consider purchasing portable and biodegradable paper potties. The previous options might not work for your kids, especially if they’re toddlers and still learning how to use the toilet.
Building Your Emergency Toilet
To set up your prepper composting toilet, take the 5-gallon bucket and set it up in your garage or somewhere outside. You want a place that is well ventilated, has some privacy, and is close to the house. The tarps can be used to create a privacy screen around the bucket if desired.
Take the bucket and line it with the 13-gallon trash bag, pushing all the air out so it hugs the sides and bottom. Make sure the top edge of the bag is draped over the top of the bucket.
Attach the seat to the bucket so that it clamps to the lip of the bucket, and holds the bag in place all the way around. Add a 1” layer of your wood chips, too. Then, position your toilet paper nearby and also set up your handwashing station near the stall.
When using the toilet, your solids will fall down into the wood chips, while your urine will go into the main portion of the unit. Once you’re finished, use just enough wood chips on top to barely cover it.
You don’t want or need to dump a lot on top because it means you’ll burn through more wood chips for no reason. It isn’t necessary and you’ll be emptying it way more frequently.
Making Sure Everything Smells Nice
A lot of people have questions about how to keep a prepper toilet setup from smelling awful. In all honesty, the best piece of advice we can give is to keep your solids and your liquids separate.
It’s when you combine the two that the stench can go into overdrive and become completely overwhelming. They won’t smell great on their own, of course, but together they become a whole new beast.
The best way to do this is by diverting urine, either by peeing separately or using a urine diverter. Men will have an easier time with this than women for obvious reasons, but fashioning a funnel with some tubing mounted inside your 5-gallon bucket draining into a container below will make simple work of it.
Make an obvious marking for the urine container so there’s no way it can get mixed up or used for something else. Staying organized is important with prepper toilets just like any other aspect of survival.
Quick Tip: Once you’ve captured the urine in your container, you can use it as a fertilizer for your garden (once you wait a little while). The reason for this is that it contains urea, which is a primary ingredient in most modern fertilizers. While it isn’t true that urine is totally sterile, it’s pretty darn close and any concerns should be set aside as the dirt and plants filter it well.
Other Emergency Toilet Considerations
Another consideration you want to make is the potential need for multiple setups. If you have a large family or a survival group, consider having additional setups just in case.
In the summer, you’ll want to empty your prepper toilets at least once a week or once they’re full (whichever comes first). During the summer months, flies will be present and can lay eggs into the pile. This greatly increases the chances of disease spreading from this area.
If you have lower use in the winter months, emptying every few weeks or when the makeshift toilet is full can be enough. This is because there are no flies and the smell tends to be significantly weaker.
In addition to your own setup, I’d strongly consider stocking extra prepper toilet kits for your neighbors and anyone that might be upstream from you if you have any surface water that travels near your property. One of the biggest threats we face even if we’re prepared is that our groundwater can be locally contaminated by others not having proper sanitation practices.
At the beginning of a disaster, make a trip to all your neighbors with the emergency kits, offering an excuse that you got the seats by accident one day in the mail. The gesture will build some goodwill, give you an excuse to do some recon on the neighbors, and protect your water supply.
Also Read: Building A Long Term Survival Shelter
How To Dispose Of Waste
The last step in the whole process is the disposal of the waste. There are three main ways to handle this. If the disaster has an end in sight (let’s say a few days), then it may be as simple as depositing it in your trash double-bagged for good measure when trash service resumes.
If the disaster looks like a long-term event, you’ll need to bury, compost, or burn the waste. Each has its pros and cons, so consider what’s right for you.
Burning is one of the simpler methods because it doesn’t require as much hands-on work and removes the waste from the site very effectively. This method should be kept for only true disaster situations. An obvious downside is that it will produce some less than pleasant smells. Also, the burning plastic of the bag is not ideal because it won’t burn cleanly.
A convenient burn setup is a metal barrel that has a grate to keep the wood a few inches off the ground. Along the bottom of the barrel, you’ll put a series of holes. This makes it so as the fire grows, the heat created on top of the mesh draws air in from the bottom. As a result, you’ll have a very hot fire that’ll burn the waste more completely than a standard fire.
Your next option is to bury the waste, which requires a hole (obviously). Your hole needs to be 100 feet from any water source, structure, or garden. The hole should be at least 4 feet deep, ideally 6 feet.
It might be smart to dig a deeper hole and, after depositing your waste and trash, cover it a bit. You should be aware that animals will try to dig up the buried items, so make sure it’s deep enough to prevent that and consider adding a cover to the hole for safety.
The final method is the most labor-intensive but is the only real option for a long-term disaster. This is the humanure method.
Human waste can actually be composted quite effectively to the point that no pathogens persist in the materials. This is a slightly more complex process, so we’ll cover the steps in another guide.
Conclusion
Using an emergency toilet is something that a lot of people don’t want to think about. It’s not a fun prospect to have to collect and dispose of their own waste.
However, it’s something you’ll need to deal with in a survival or disaster scenario (unless your body works differently than the rest of us).
Being prepared and having everything you need to use an emergency toilet will bring peace of mind and a much lower risk of sickness if things go wrong later on. If they do, you’ll be happy you prepared!